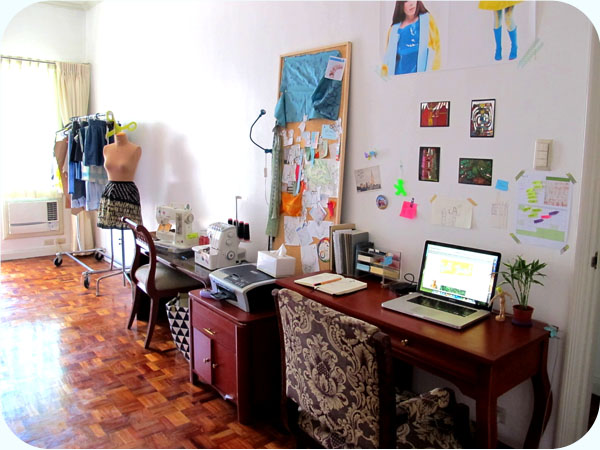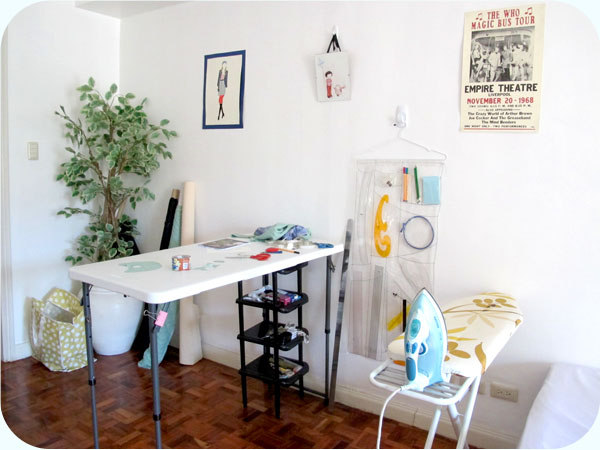
I love my studio space in Manila. Intended as the master bedroom, it's a lovely big room with lots of natural light, a balcony and plenty of storage space. I have everything I need to run my business set up so I'm ready to work every day. The only thing I didn't bring with me from my work room in Australia was the big cutting table that my dad and I made. Keeping in mind that we'll be moving again in two years, I bought a folding adjustable height table to serve as my cutting table while I'm here. It's the perfect height and it does the job fine, but it is a very limited space.

I found that a lot of the time, half the space on my table was taken up by whatever tools I was using - rulers, pencils, scissors etc. I needed somewhere to put all that stuff where it could still be within easy reach to use, but be off the table. I partly solved this problem by buying some small black shelves, which can be seen in the photo above. Those shelves hold small objects like pins, chalk, scissors, pattern notchers and other tools. To keep all of my pattern making rulers accessible but off the table, I made this custom shaped ruler-holder-thingy (good name huh?). It was a really quick easy project and you could make something similar to hold any sort of lightweight tools - kitchen stuff, art supplies, make up - anything you can think of.

If you want to make something like this, you'll need some clear plastic sheeting - the kind used to cover tables at outdoor cafes. I seem to always have some of this around because it was used so heavily in my grad collection, but it's really handy for other projects too! You can get it really cheaply at hardware shops or some of the bigger dollar stores/variety shops/whatever you want to call them. You'll also need a way to attach it to the wall. I ended up just stitching it to a wide coat hanger and hanging it from a jumbo sticky hook on the wall. Make sure the weight of your objects is evenly distributed or it'll hang on a wonky angle.

How to make it:
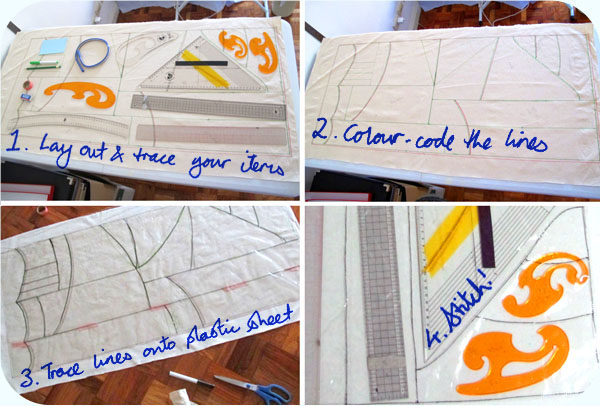
1. Arrange your objects how you'd like them and trace sections onto a piece of paper (or a bit of cheap fabric, if you don't have a large enough piece of paper handy). Think about how they'll fit into pockets and how you'll get them out - make sure at least 4-5cm of the object is sticking out the top of it's pocket so you can grab it easily.
2. Next, get two coloured pens - one for cutting lines, and one for sewing lines. Concentrate and think about which lines represent a pocket opening and which lines represent dividers or the bottom of a pocket.
3. Lay out two plastic sheets on top of each other - they'll kind of stick together, but that's ok. Make sure they're flat. Trace your cutting lines onto the top layer of plastic. If you use a whiteboard marker, you can just wipe it off after you've finished. Cut along the cutting lines (don't use fabric scissors!). Then trace the sewing lines. Put a few pins in to keep the layers in place, but not too many because they leave little holes in the plastic. The plastic actually sticks together so well that you don't need many pins at all.
4. Stitch along all of your sewing lines. Use big stitches and adjust the tension so they're not too loose. It can be a bit tricky to move around a big piece of plastic on a sewing machine, so this part will take some patience. Roll the plastic up and work one section at a time. Once you're finished, you can hang it up and move everything into it!

No comments:
Post a Comment